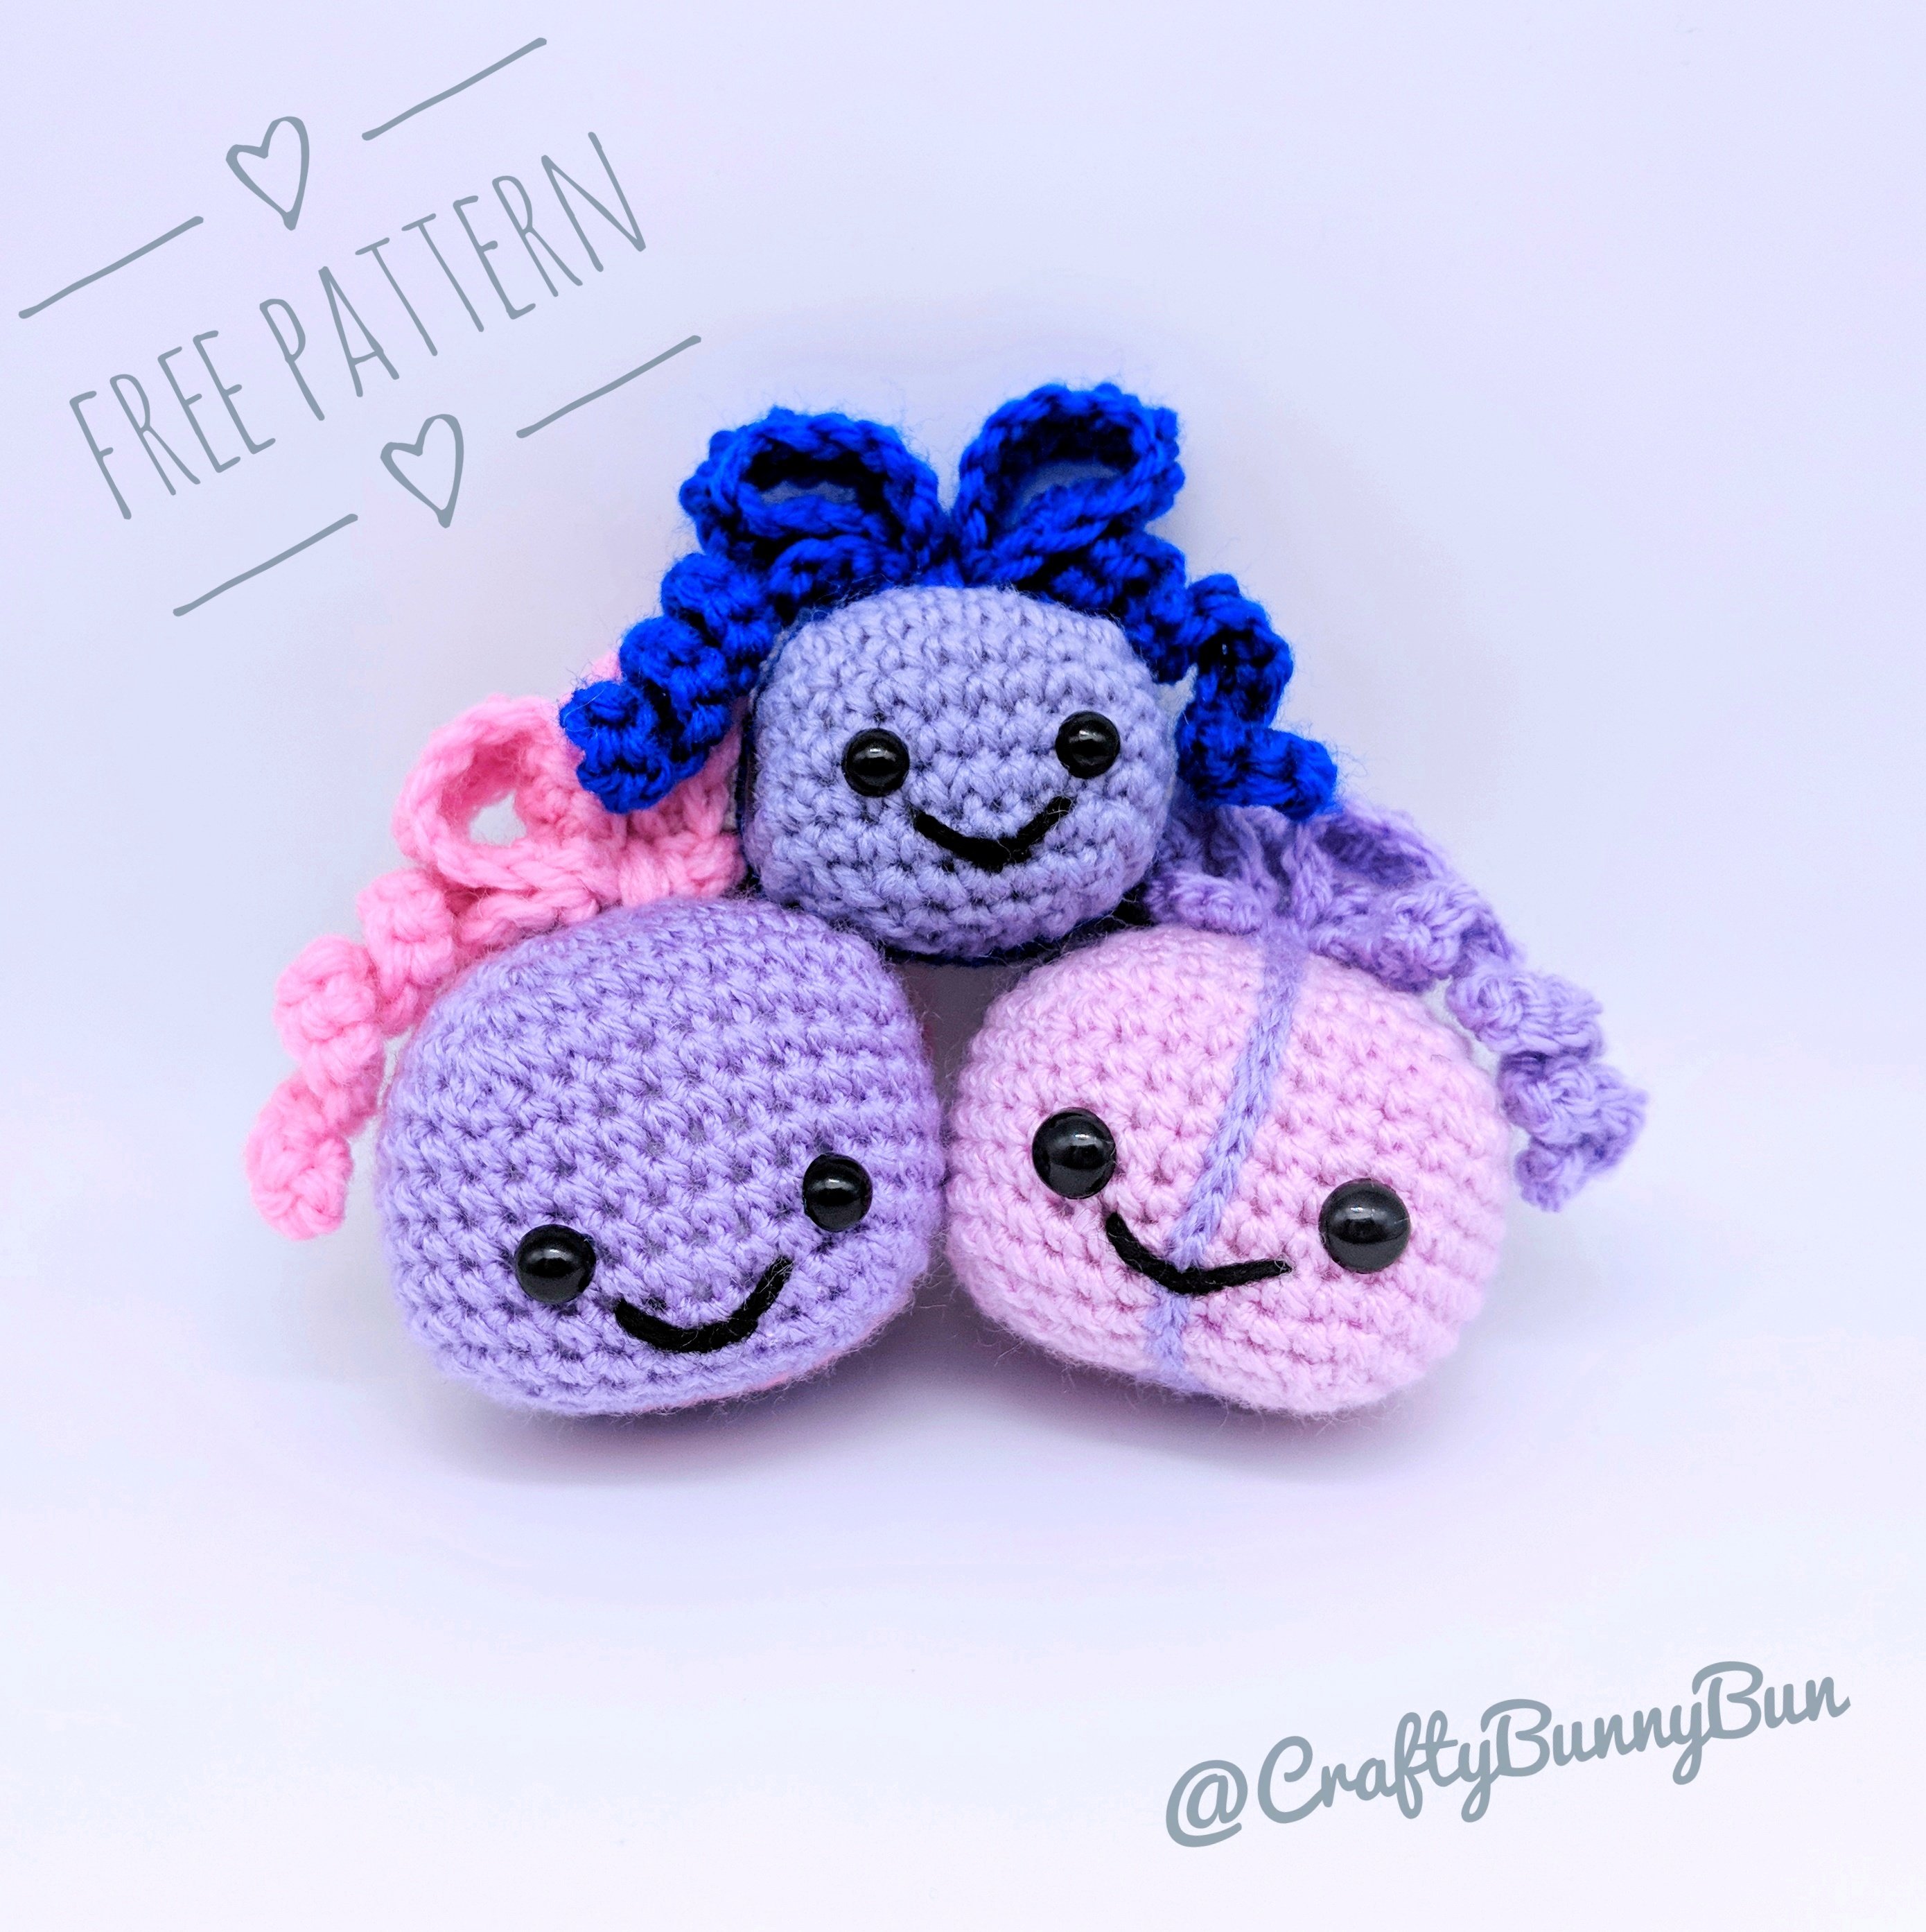
This is my easiest pattern to date. Super fast, super easy, almost new sewing required. It's a little happy gift box with a big ribbon on top. Just in time for Christmas :)
This pattern has  on Ravelry.
Material
- 3mm crochet hook
- DK yarn in any two contrasting colors
- Safety eyes in size of choice
- Tapestry needle
- Stuffing
Abbreviations (US)
- MC: magic circle/ring
- st: stitch
- 2-sc inc: 2 sc in next stitch (increase by 1)
- 3-sc inc: 3 sc in next stitch (increase by 2)
- sc2tog: 2 sc together (decrease by 1)
- sc3tog: 3 sc together (decrease by 2)
- dc: double crochet
Instructions
This pattern is made in a spiral of continuous rounds
Body (make 1)
You can make a big or a small box, it's up to you. In the reference pictures I made a big box but the instructions are identical for both sizes.
Big Gift Box:
|
Row # |
Instructions |
Sts |
|
R1 |
4-sc MC |
4 |
|
R2 |
3-sc inc × 4 |
12 |
|
R3 |
sc, 3-sc inc, [sc × 2, 3-sc inc] × 3, sc |
20 |
|
R4 |
sc × 2, 3-sc inc, [sc × 4, 3-sc inc] × 3, sc × 2 |
28 |
|
R5 |
sc × 3, 3-sc inc, [sc × 6, 3-sc inc] × 3, sc × 3 |
36 |
|
R6 |
sc × 4, 3-sc inc, [sc × 8, 3-sc inc] × 3, sc × 4 |
44 |
|
R7 |
sc × 5, sc2tog, [sc × 9, sc2tog] × 3, sc × 4 |
40 |
|
R8-13 |
sc × 40 |
40 |
|
R14 |
sc × 4, sc3tog, [sc × 7, sc3tog] × 3, sc × 3 |
32 |
|
R15 |
sc × 3, sc3tog, [sc × 5, sc3tog] × 3, sc × 2 |
24 |
|
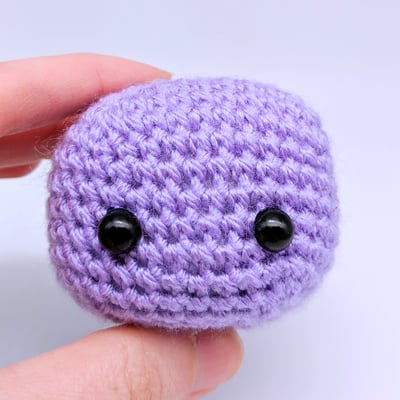
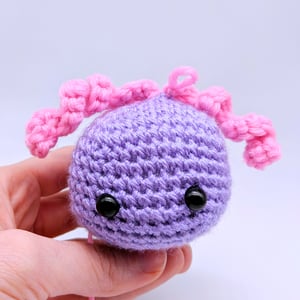
Place the eyes between R10 and R11 with 6 stitch holes between them. See pictures for reference. Stuff well! |
||
|
R16 |
sc × 2, sc3tog, [sc × 3, sc3tog] × 3, sc |
16 |
|
R17 |
[sc, sc3tog] × 4 |
8 |
Finish off, sew the ends together to close the gap with the tapestry needle.
Small Gift Box:
|
Row # |
Instructions |
Sts |
|
R1 |
4-sc MC |
4 |
|
R2 |
3-sc inc × 4 |
12 |
|
R3 |
sc, 3-sc inc, [sc × 2, 3-sc inc] × 3, sc |
20 |
|
R4 |
sc × 2, 3-sc inc, [sc × 4, 3-sc inc] × 3, sc × 2 |
28 |
|
R5 |
sc × 3, 3-sc inc, [sc × 6, 3-sc inc] × 3, sc × 3 |
36 |
|
R6 |
sc × 4, sc2tog, [sc × 7, sc2tog] × 3, sc × 4 |
32 |
|
R7-10 |
sc × 40 |
32 |
|
R11 |
sc × 3, sc3tog, [sc × 5, sc3tog] × 3, sc × 2 |
24 |
|
Place the eyes between R8 and R9 with 4 stitch holes between them. See pictures for reference. Stuff well! |
||
|
R12 |
sc × 2, sc3tog, [sc × 3, sc3tog] × 3, sc |
16 |
|
R13 |
[sc, sc3tog] × 4 |
8 |
Finish off, sew the ends together to close the gap with the tapestry needle.

Important tip for any amigurumi you make:
Shape the stuffed body by pressing firmly on its sides to resemble the shape you are trying to achieve. Stuffed amigurumi shapes are like a rubbery piece of clay that can actually be shaped quite a bit! Always take advantage of that fact.
Gift Wrapping:
All the following instructions are done continuously without cutting the yarn in between instructions. Don't cut the yarn off until I mention it.
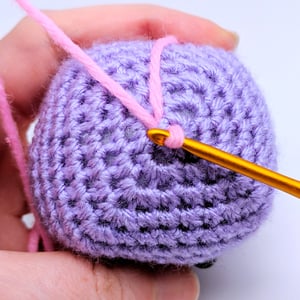
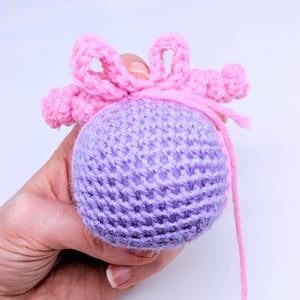
Using a contracting color yarn, go around the cube starting from the top magic circle center with a slip stitch. You do the slip stitch by inserting the hook into the stitch holes as per the picture.
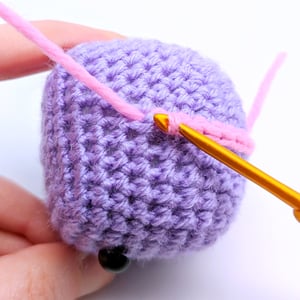
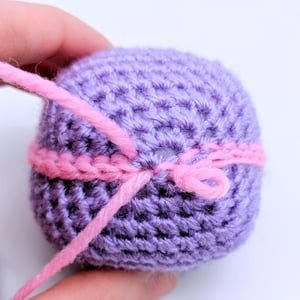 You should end up with this when you finish going around once. You can do another round perpendicular to the first if you want to go for the cross wrap style. The idea is to go around the cube starting from the top and ending at the top. Don't cut the yarn when you are done! Continue to make the gift ribbon as per the instructions in the following section
Gift Ribbon (make 2)
| Row# | Instructions | Sts |
| R1 | ch × 15 | 15 |
| R2 | Turn, 2-sc inc × 14 | 28 |
Do one slip stitch into the cube to secure the ribbon in place.
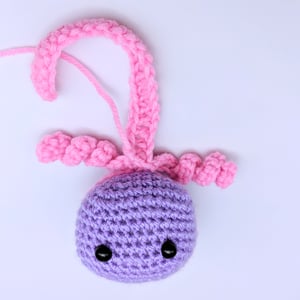
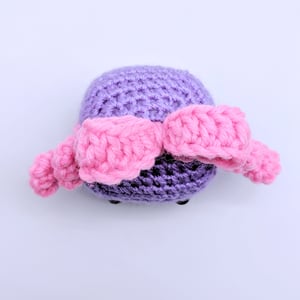
 Make two ribbons. You should end up with something like the picture on the left.
Don't cut the yarn when you are done. Continue to make the ribbon bow as per the instructions in the following section.
Ribbon Bow
| Row# | Instructions | Sts |
| R1 | ch × 25 | 25 |
| R2 | Turn, (skip 1 ch), dc × 23 | 28 |
You'll end up with a long thick ribbon. Now it's time to cut the yarn leaving a long tail. Now we move on to the only part that requires a tiny bit of sewing :)
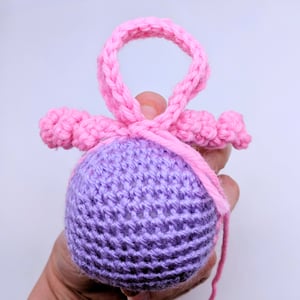 Use the yarn tail and the tapestry needle to attach the ribbon end to the start to make a ring shape. Be careful to attach it so it forms a ring with no twists as per the picture (make sure the right side faces up).
 Pinch the ring on itself in the center as per the picture. Then use the needle to loop around the center of the ring and underneath to secure it.
Do it several times until you are satisfied with the resulting knot.
Finally you can use a tiny bit of black yarn to embroider a smile on its little face. After All it's called a happy gift for a reason :)