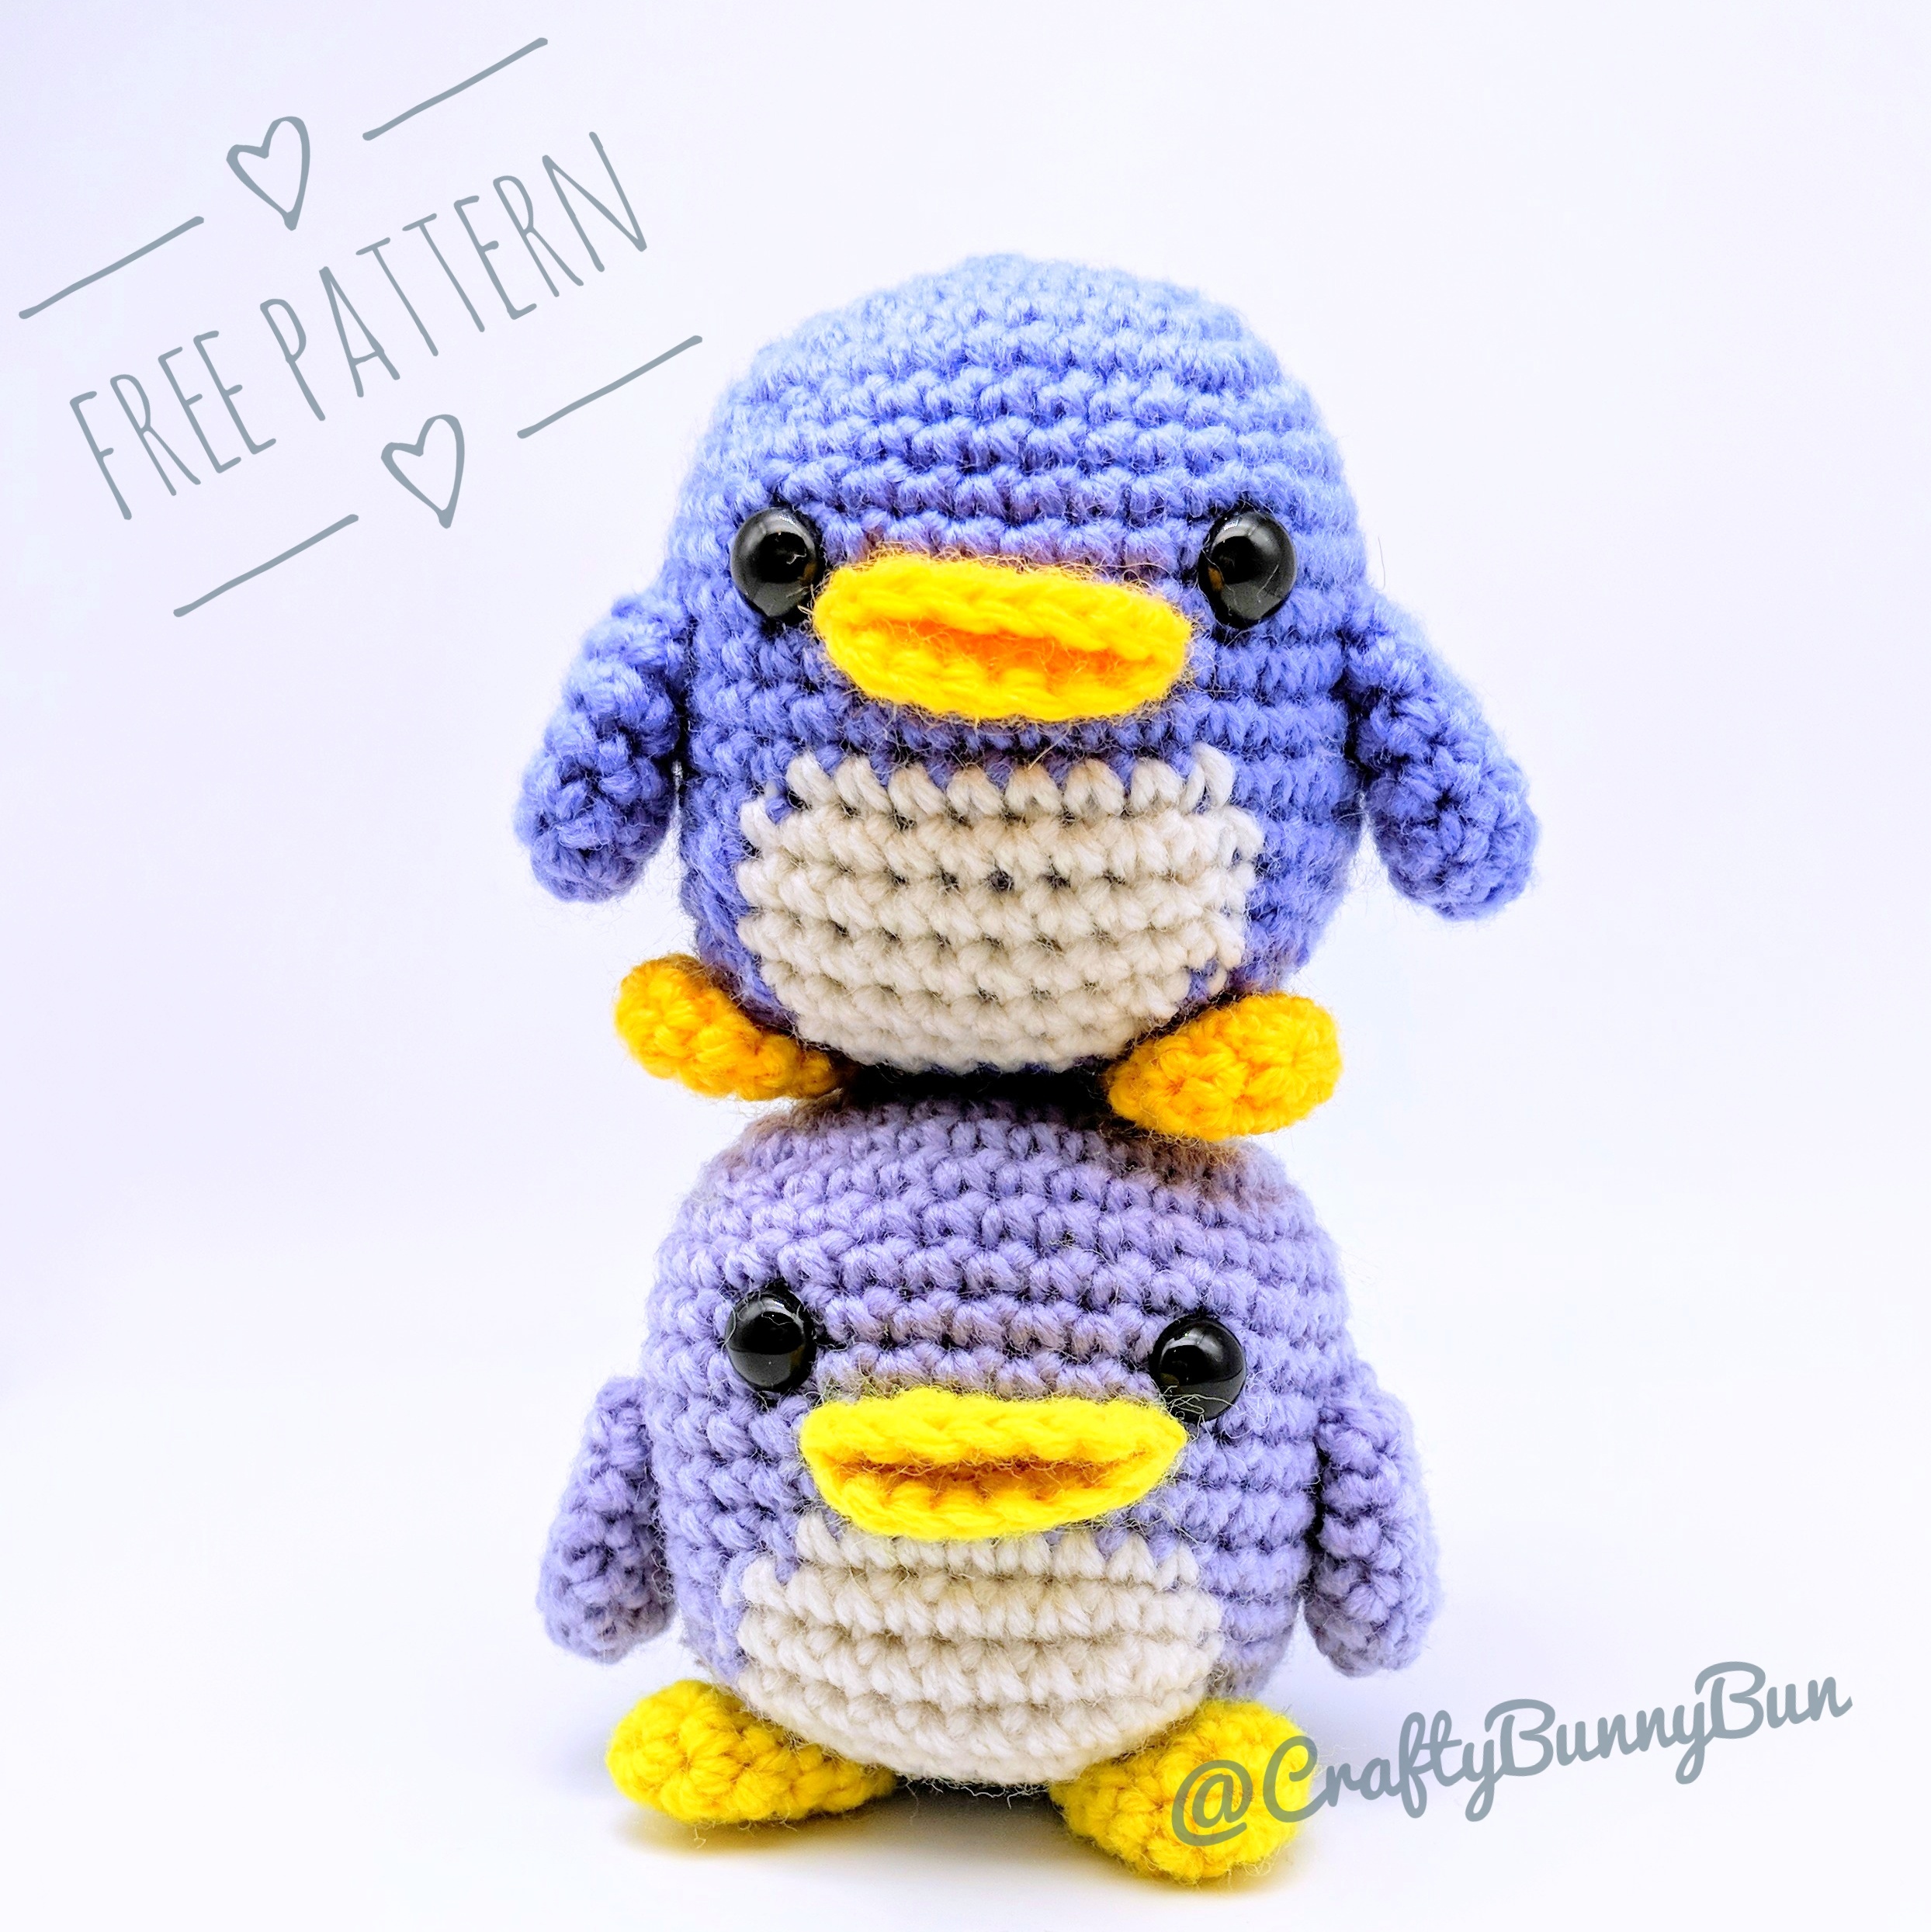
 Who wouldn't like a cube Penguin! You can even stack two of them on top of each other :)
This pattern has  on Ravelry.
Material
- 3mm crochet hook
- DK yarn in blue, white and yellow
- 8mm safety eyes
Abbreviations (US)
- MC: magic circle
- 2-sc inc: 2 sc in next st (increase by 1)
- 3-sc inc: 3 sc in next st (increase by 2)
- sc2tog: 2 sc together (decrease by 1)
- sc3tog: 3 sc together (decrease by 2)
Instructions
This pattern is made in a spiral of continuous rounds
To change color, use old color to do the first yarn over, then use new color to do the last yarn over and draw through both loops on hook to complete stitch. The stitch will count toward the old color but the following stitches will have the new color. To make it easier I’ll indicate the stitch where the color change happen with a comment (old color ➤ new color)
Let’s say the instructions are: sc x 6 (blue), sc (blue ➤ white) , sc (white)
It means sc x 6 blue, sc with blue for the first yarn over then do the second yarn over with white (still looks like a blue sc), then do one sc with white
First, I’ll start with the peak. Starting with it helps you determine the eye spacing on the body so the peak can fit between them.
Peak (make 1)
With the yellow yarn:
|
Row # |
Instructions |
Sts |
|
R1 |
4-sc MC |
4 |
|
R2 |
3-sc inc × 4 |
12 |
|
R3 |
sc, 3-sc inc, [sc × 2, 3-sc inc] × 3, sc |
20 |
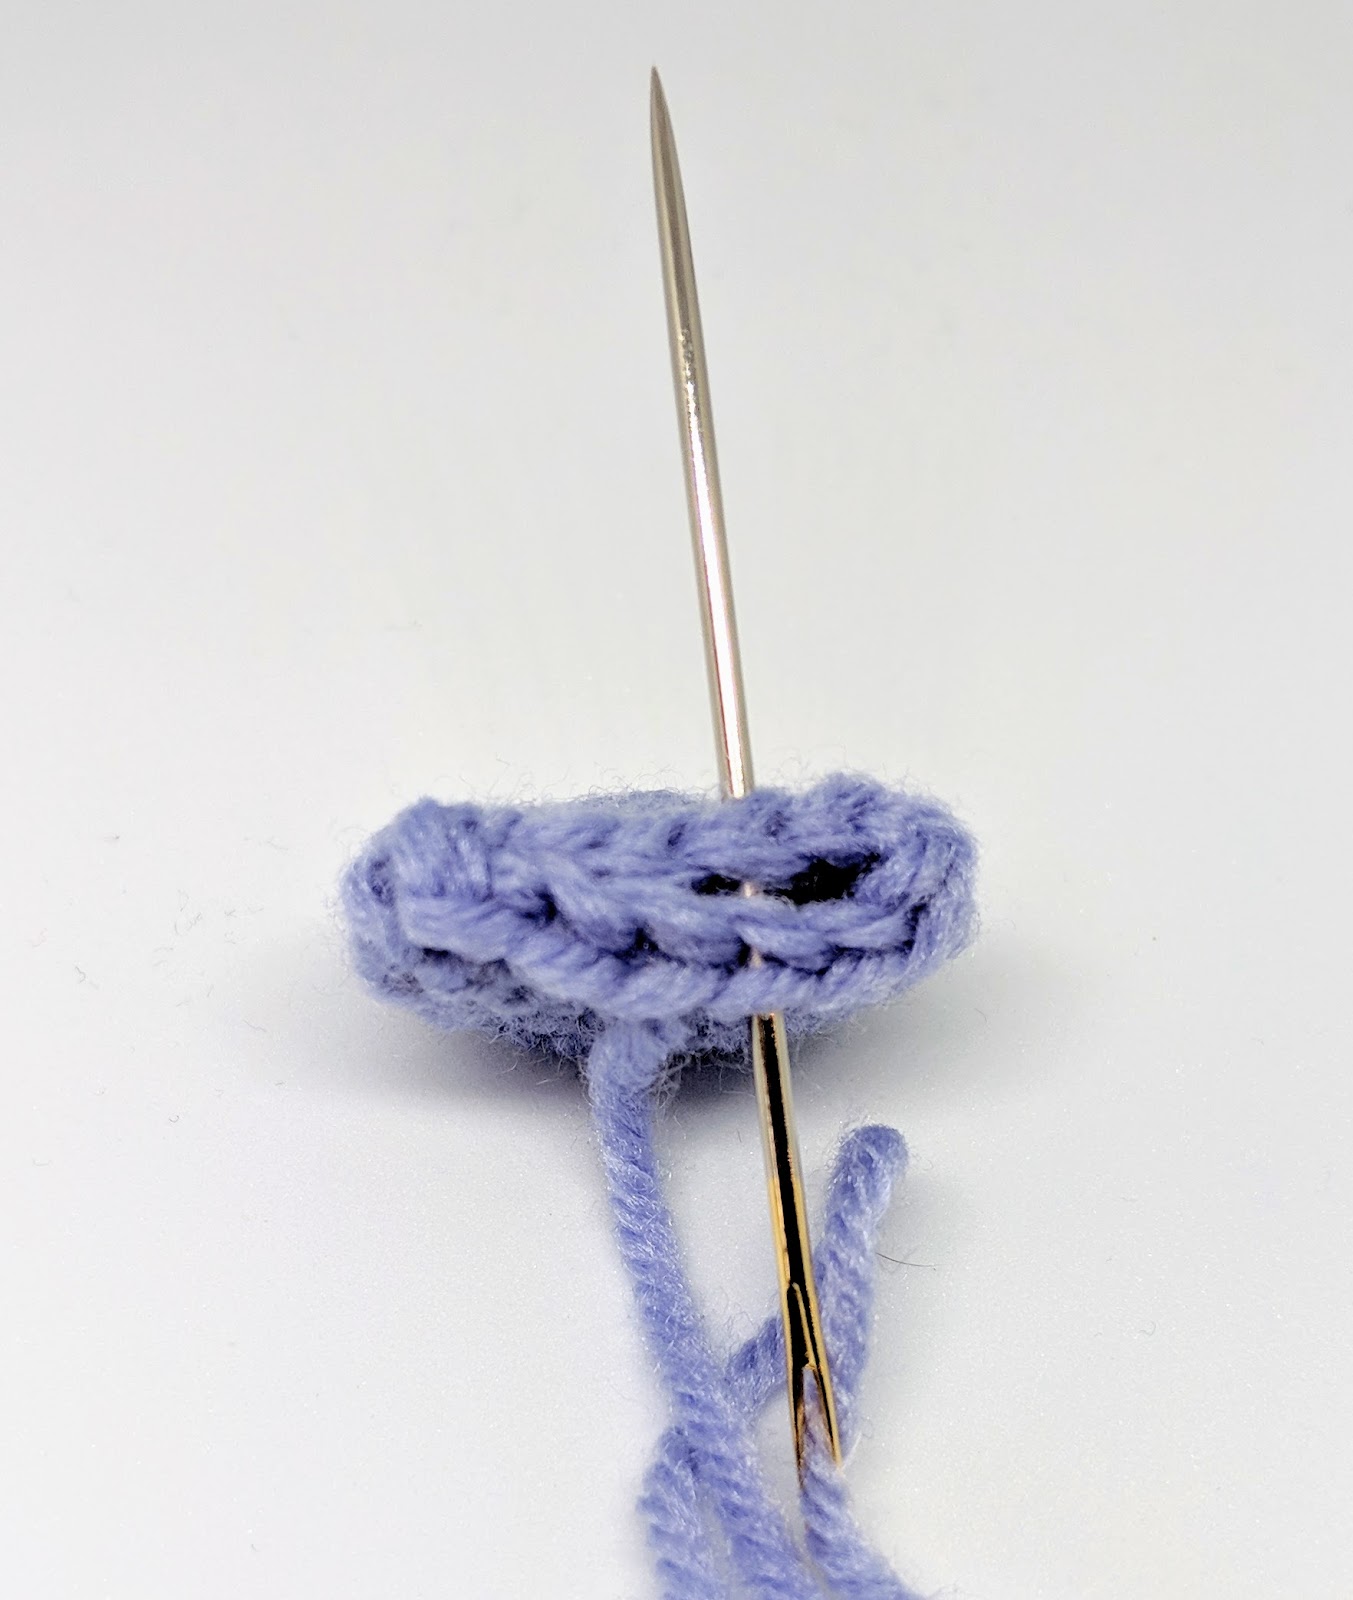
Do one slip stitch after the last stitch then finish off and leave a long tail.
The resulting shape is a square. Fold the square on itself, hide the magic circle yarn tail inside the folded part. Use a sewing needle to sew along the folded side to press the two sides together as per the pictures below:


Body (make 1)
|
Row # |
Instructions |
Sts |
|
R1 |
4-sc MC |
4 |
|
R2 |
3-sc inc × 4 |
12 |
|
R3 |
sc, 3-sc inc, [sc × 2, 3-sc inc] × 3, sc |
20 |
|
R4 |
sc × 2, 3-sc inc, [sc × 4, 3-sc inc] × 3, sc × 2 |
28 |
|
R5 |
sc × 3, 3-sc inc, [sc × 6, 3-sc inc] × 3, sc × 3 |
36 |
|
R6 |
sc × 4, 3-sc inc, [sc × 8, 3-sc inc] × 3, sc × 4 |
44 |
|
R7 |
sc × 5, sc2tog, [sc × 9, sc2tog] × 3, sc × 4 |
40 |
|
R8-13 |
sc × 40 |
40 |
|
R14 |
sc × 6 (blue), sc (blue ➤ white), sc × 7 (white), sc (white ➤ blue), sc × 25 (blue) |
40 |
|
R15-17 |
sc × 5 (blue), sc (blue ➤ white), sc × 9 (white), sc (white ➤ blue), sc × 24 (blue) |
40 |
|
R18 |
sc × 4 (blue) , sc3tog (blue ➤ white), sc × 7, sc3tog (white ➤ blue), Continue with blue [sc × 7, sc3tog] × 2, sc × 3 |
32 |
|
R19 |
sc × 4 (blue) , sc3tog (blue ➤ white), sc × 5, sc3tog (white ➤ blue), Continue with blue [sc × 5, sc3tog] × 2, sc |
24 |
|
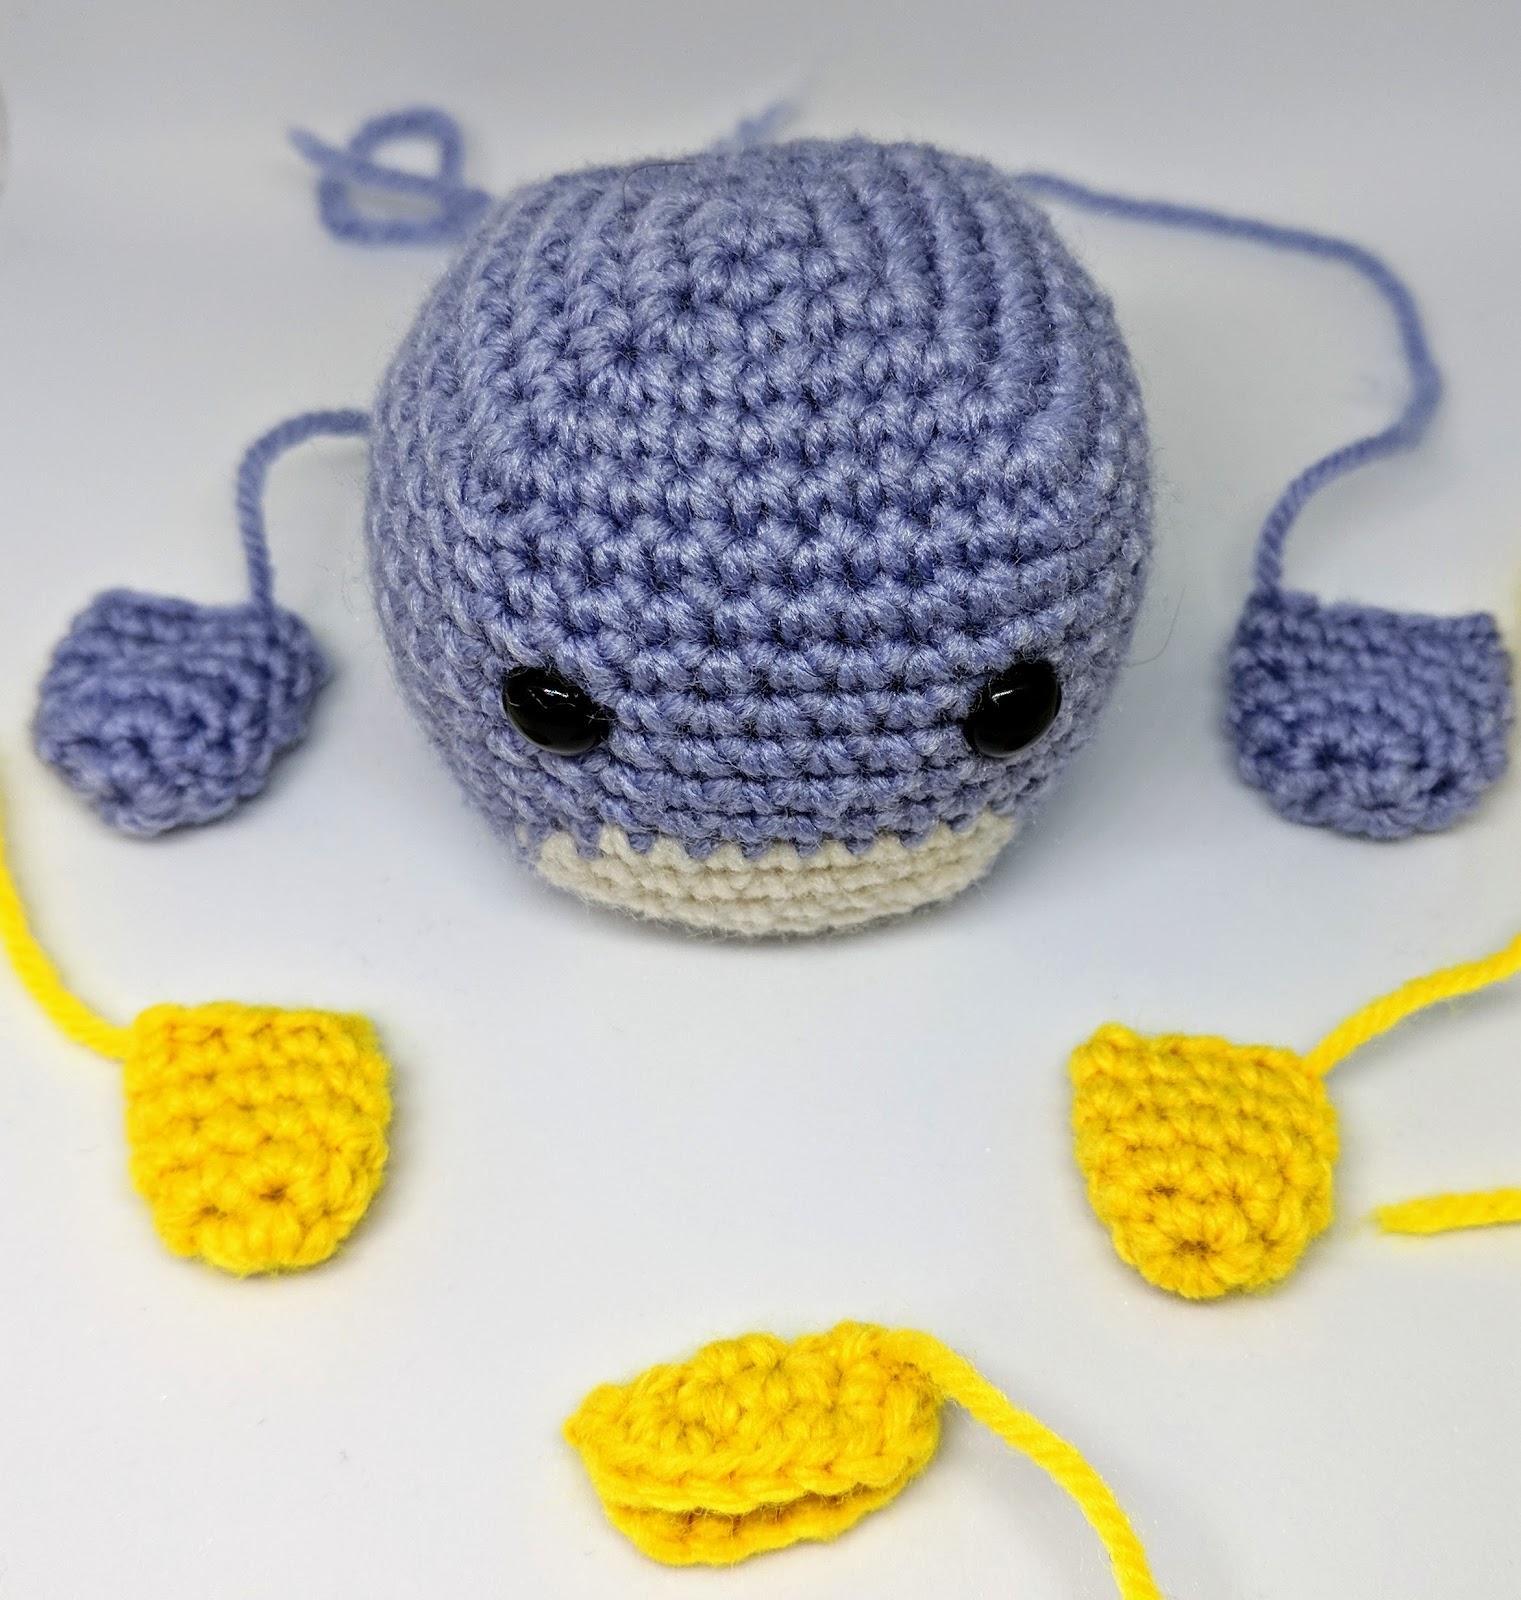
Stuff well. Place the eyes between R10 and R11. Place them about 8 sts apart. See pictures for reference. There is going to be a peak in the middle so leave room for that. Continue the rest with the blue yarn only: |
||
|
R20 |
sc × 2, sc3tog, [sc × 3, sc3tog] × 3, sc |
16 |
|
R21 |
[sc, sc3tog] × 4 |
8 |
Finish off, sew the ends together to close the gap.
Wings (make 2)
|
Row # |
Instructions |
Sts |
|
R1 |
6-sc MC |
6 |
|
R2 |
2-sc inc × 6 |
12 |
|
R3-6 |
sc × 12 |
12 |
Leave long tail. Do not stuff
Sew the end of the each wing together to close it off flat as shown in the picture
Feet (make 2)
|
Row # |
Instructions |
Sts |
|
R1 |
5-sc MC |
5 |
|
R2 |
2-sc inc × 5 |
10 |
|
R3-6 |
sc × 10 |
10 |
Leave long tail. Do not stuff
Sew the end of the each feet together to close it off flat as you did with the wings.
Assembly

Using a sewing needle:
- Attach the peak between the eyes on R12.
- Attach the wings to the side of the penguin on R12. Sew the wings to lay flat on the penguin
sides. - Attach the little feet at the bottom of the penguin. For a cuter effect space them apart and have them point a little outward to each side rather than just straight to the front see the following pictures for reference